
Users new to RIDE and Unity will want to ensure their development environment is fully setup before continuing further. See the Standalone Application Customization tutorial for details.
Important The example in this tutorial utilizes the A* movement system solution over the standard Unity navigation mesh movement system. This solution is optional for RIDE users currently. The A* Pathfinding Project Pro package license is per seat and can be obtained from the Unity Asset Store. |
Start by creating a new empty scene in the Unity editor.
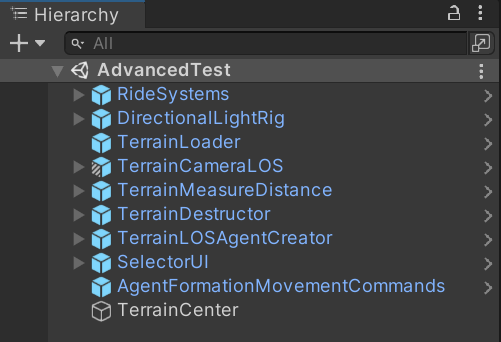
Next, drag into the scene Hierarchy panel various RIDE prefabs that encapsulate capabilities of the API.
Instance an empty game object that will serve as the center/origin point in which terrain tiles stream into the scene at run-time.
Switch to A* movement system for agents.
Load specific terrain map and adjust parameters.
Note, the example shown in the top image utilizes TL_Korabela.
Adjust the Transform Position and Rotation values as needed to ensure a framed view for a particular location of interest on the map at runtime.
Achievement Unlocked! Further expand your scene by adding other RIDE system prefabs, or system prefabs of your own design. |
Visit the Examples documentation for individual capability details and instruction.
This “AdvancedTest” scene utilizes the following capabilities: