Using the Standalone Application

Overview

The RIDE standalone application features a collection of example scenes that display key capabilities of the API. 

This tutorial is geared toward developers and researchers of all levels that wish to demonstrate RIDE using the “LevelSelect” scene, which is the basis for the standalone application under the Unity implementation.
Page Contents

RideUnity_LevelSelect

Overview

The RIDE standalone application features a collection of example scenes that display key capabilities of the API. 

Binaries for the RIDE standalone application are available for the following platforms:

  • Win64
  • macOS
  • Android
  • iOS
  • WebGL

Disclaimer: Some capabilities and features may not available on all platforms.

Note: Standalone RIDE applications are compiled with Unity version 2022.3.13f1. Differences may exist from a local development build on another version.

Matching User Type

The RIDE API Binary is best suited to the type of user described in the table below.  

Role 

Purpose

Modifications to Source Code?

Admin/ManagerRIDE platform standalone demonstrations, evaluation as-is; non-developer Non-development

Requirements

Hardware

Table of system requirements for the Unity Player based upon user role. 

Role 

System Requirements 

Reference Link

Admin/ManagerRefer to Unity documentationPlayer

Software

Table of software requirements for the Unity Player based upon user role. 

Role 

Software Requirements

Admin/ManagerNone

Obtaining the Standalone App

The process is simple to acquire the RIDE API binary: 

  1. Submit a RIDE Binary Request through https://ride.ict.usc.edu/getting-started/obtain-ride/
  2. Once approved, click the provided download link to the appropriate platform binary for the RIDE distribution package.

Alternatively, if your RIDE Distribution Agreement includes the full RIDE SDK source, the LevelSelect scene, which serves as the basis for the RIDE standalone application, can be compiled locally. Refer to the Standalone Application Customization tutorial for instruction.

Using the Standalone App – PC

Instructions for launch and navigation of the RIDE standalone application.

  1. Download the package of your chosen platform to your local PC (5 GB or greater of free space recommended) 
  2. Extract the compressed folder contents for your chosen platform.
  3. Inside the folder, run the RIDE executable (extension varies by platform)
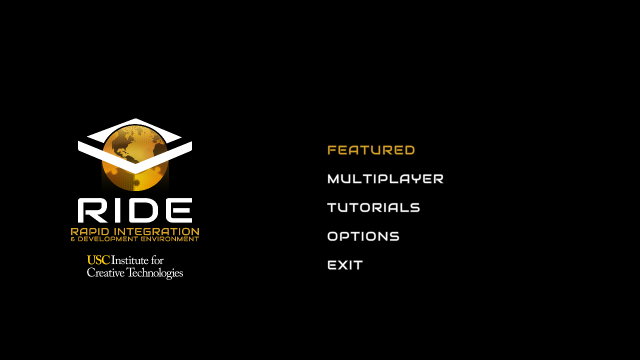
  4. The main menu presents the following choices:
    1. Featured – Advanced integrations and capabilities with a curated listing of scenes.
    2. Multiplayer – Team Match scenes playable online.
    3. Tutorials – Collects a variety of Example scenes.
    4. Options – Input terrain key and other settings.
    5. Exit – Quit the app.
  5. Choose Featured, Multiplayer or Tutorials to view each respective scene listing.
    1. Select a scene to view its details in the right panel.
    2. Capabilities entries all have tool-tips with more information.
    3. Project entries also have tool-tips and hotlink to that respective project’s Confluence documentation. 
  6. Click Play to launch a selected scene.
  7. To exit a scene, press the Escape key to return to the main menu.

Note, the different Level Select scenes are navigable via keyboard controls: arrow keys to select, Enter key to confirm, Backspace key to back out. Escape key to quit.

Scene Information and Instructions

Visit the Examples documentation for individual scene details and instruction. For instance, refer to the Team Match page for steps to create/join a match and a list of all dismounted avatar controls.

General Controls

When in a particular scene, the following controls are commonly available: 

  • J key toggles mouse look and WASD “flying” camera
  • ~ key toggles the console tool
  • F12 toggles aim mode (First-person view input only)

Note, certain scenes may have varying controls and use the V key to toggle mouse look and WASD “flying” camera

GUI Debug Menu Navigation

Several scenes utilize a debug menu that appears in the upper-left corner by default. 

  • If enabled, C key or F11 toggles off/on this menu
  • Specific scene functions always appear in the first menu
  • Step to the next menu be either clicking the middle title bar or arrows (>>) at the top
  • System statistics appear in subsequent menus

Advanced Features

Command Line Arguments

Pass arguments through the command line at run-time by first calling up the console tool using the ~ key.

  • -json “path/to/the/scenario.json”
    • the json contains the terrain, the units, their positions, and their teams; it also allows for starting move behaviors
  • -duration 10.0
    • how long to run the simulation before quitting
  • -timeScale 2.0
    • how fast to run the simulation such that 2.0 is double speed and .5 is half time
  • -isWaitAndQuit true
    • quit the application after duration so you can run another one; otherwise, false means leave scenario running
  • -logScenarioFile “path/to/scenarioLogs.json”
    • the file to save all of the logs
  • -updateLogRate 10.0
    • how many times per second to write the positions of all units to the log file