Standalone Application Customization

Overview

The RIDE standalone application features a collection of example scenes that display key capabilities of the API. This application can be built locally with custom scenes added to the existing LevelSelect scene sub-menu listings for your own demonstration purposes. 

This tutorial is geared toward developers and researchers working with the RIDE project source and new to the Unity development platform. Topics covered include basic scene creation, script modifications, adjusting scene parameters and building a standalone executable for desktop systems.

Page Contents

RideUnity_LevelSelect

Requirements

Currently, in order to modify and compile locally the LevelSelect scene in Unity, your RIDE Distribution Agreement must include the full RIDE SDK source, which serves as the basis for the RIDE standalone application.

Users new to RIDE and Unity will want to ensure their development environment is completely setup before continuing further. If already setup, users may skip to the LevelSelect modification section.

Prerequisites

  • Unity Hub
  • Unity version 2022.x, LTS 2021.3.x or LTS 2020.3.x
  • RIDE project source (requires minimum 30 GB of free disk space)

IMPORTANT

Note, under 2020.3.x, Microsoft.Extensions.Logging.Abstractions.dll and NonverbalBehaviorGenerator.dll need to be manually excluded from being compiled by unchecking their respective Import Settings inside the Inspector pane.

Recommendations

  • Version control software (Subversion client TortiseSVN or similar)
  • Text or source code editor (Notepad++ or similar)

Unity Hub Installation

The Unity Hub utility controls which versions of the platform are installed on the local machine.

  1. Navigate to https://unity3d.com/get-unity/download
  2. Click “Download Unity Hub” button.
  3. Download and install Unity Hub.
  4. Run the application, and proceed to create an account or login.
  5. Inside Preferences, License Management, choose Activate New License option.
  6. Complete License Agreement.   

Refrain from acquiring any version of Unity from the Hub for the moment. See next section for Unity installation steps.

Unity Editor Installation Using runUnity.bat 

With Unity Hub now installed, locate the runUnity.bat file at the top level of the RIDE repository; certain users will find it under \trunk. When first initialized, this process calls Unity Hub for a “headless” (background) automatic installation of the proper version of the Unity editor and modules for the project. (Remain connected to the Internet during the next set of steps.) 

  1. Recommend for first-time launch with runUnity.bat that it’s initialized through the command line; using this method displays the status of the process and any errors.
  2. On Windows, open File Explorer to the directory with runUnity.bat.
  3. Click in the address bar and clear the path text.
  4. Type “cmd” in the field and press Enter; a command prompt will appear with the current directory path.
  5. Type “runUnity” and press Enter.
  6. Wait for the “headless” process to download and install the Unity target version via Unity Hub; this can take a while.
  7. When complete, Unity will initialize and begin to ingest the project files and build a local library; this too can take a while.
  8. After the local library creation finishes, the Unity application will open to the RIDE project.
  9. If successful, subsequent launches of the project can be done with runUnity.bat directly, no need to use the command line.

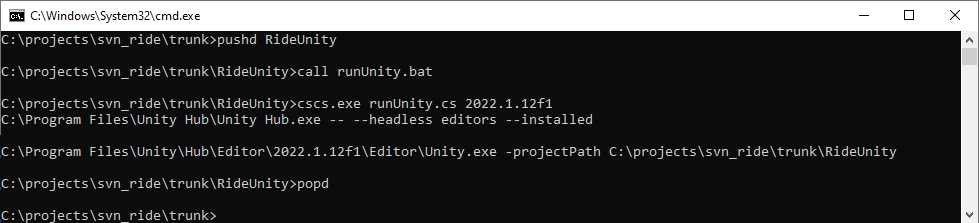
Important

Always use runUnity.bat to open the RIDE Unity development environment. This will ensure you are using the correct version of Unity every time. Do not launch the RIDE project through Unity Hub.


Tip

If the “headless” installation process fails, the desired version can be acquired through the Unity Archive page, https://unity3d.com/get-unity/download/archive

  1. Select the option from the page to download and install the desired version through Unity Hub; installation can take a while.
  2. Note, Unity Hub will prompt for a license if not already present; create an account or login, and then complete the License Agreement process.
  3. After installation completes, relaunch runUnity.bat in order to initialize Unity and create the local project library; this too can take a while.
  4. Once the local library creation finishes, the Unity application will open to the RIDE project.

RIDE Source Code

External organizations may request access to the full RIDE SDK source code via, https://ride.ict.usc.edu/getting-started/obtain-ride/

  1. Once approved, download the source code package to a data drive on the local machine with at minimum 30 GB of free space.
  2. Unzip the package contents; recommend placing them inside of a local “Projects” directory.

VCS Subversion Client – TortiseSVN

Version control software (VCS) allows the tracking of individual file changes inside of a code base. In the event a “breaking” code change is committed, these changes can be easily compared against prior versions of the file(s) using the VCS client, and the file(s) reverted to another “known good” version.

  1. Navigate to https://tortoisesvn.net/
  2. Download, install and configure latest TortiseSVN Subversion client
  3. Note, TortiseSVN is Windows only; alternative Subversion clients exist for macOS and Linux 

Text or Source Code Editor – Notepad++

Advanced text editors tailored to script and source code will help avoid mistakes that can occur when editing these types of files in a standard text editor or word processor.

  1. Navigate to https://notepad-plus-plus.org/
  2. Download and install latest Notepad++
  3. Note, Notepad++ is Windows only; suitable alternatives exist for macOS and Linux 

Achievement Unlocked!

Now that all of the development environment requirements have been met, the RIDE project and LevelSelect scene can be modified as desired. See next section for instruction.

New Scene Creation for LevelSelect Scene Featured Listing 

How to create a basic test scene compatible with LevelSelect scene Featured listing

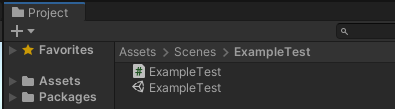
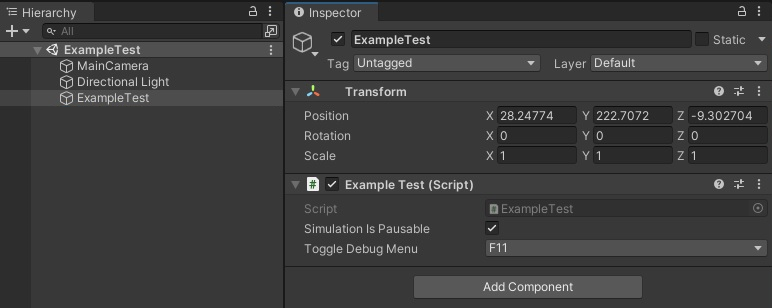
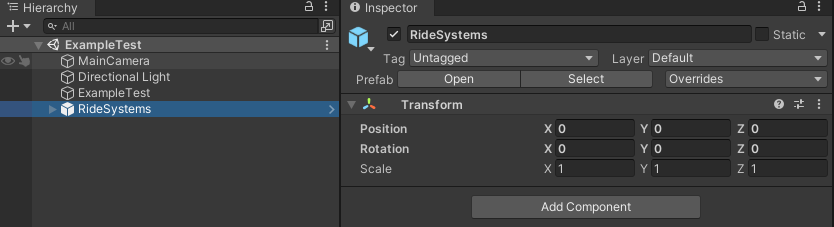
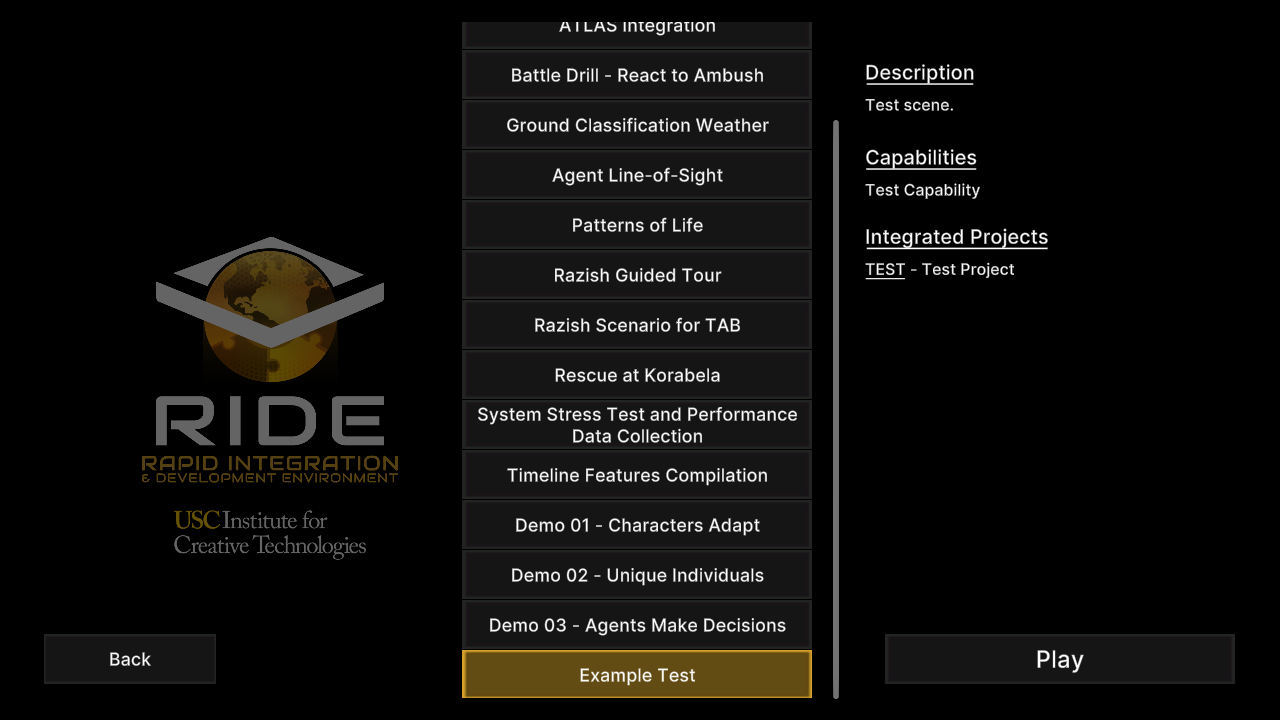
If new to Unity and RIDE environemnts, recommend first creating the most basic test scene that can launch from, and return to, the LevelSelect scene Featured listing. 

  1. Unity editor, File > New Scene
  2. File > Save As…
  3. Within the project directory, navigate to /Assets/Scenes
  4. Create a new sub-folder, giving it the same name as the new scene that will be saved. (Ex. “ExampleTest”)
  5. Open this new sub-folder.
  6. Name the scene the same as the sub-folder and click Save.
  7. In Project panel, search field, type “ridebase”
  8. Double-click this file (RideBase.cs) to open it in the system default text editor. Recommend Notepad++ or other source code editor.
  9. Copy the first 31 lines of file text.
  10. Create new file in text editor of choice.
  11. Paste 31 lines into new file.
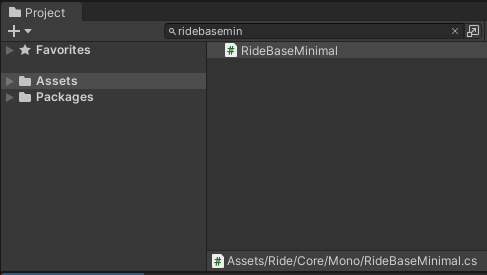
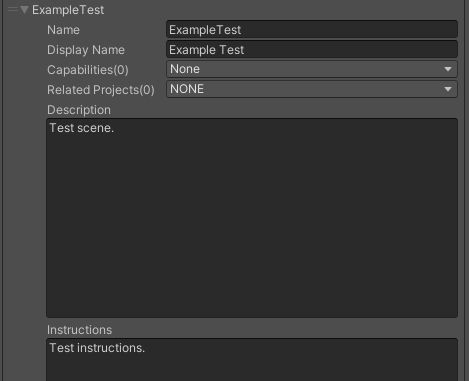
  12. Modify the script to appear exactly as the provided code block example; however, replace the “public class” value of “ExampleTest” with the name of your newly saved scene. This new class is derived from “RideBaseMinimal” which enables the bare minimum of  RIDE systems, including load/exit of the individual scene within the LevelSelect scene.  

    ExampleTest.cs
				
					
using System;
using UnityEngine;
using Ride;
using Ride.IO;
using Ride.UI;

namespace Ride.Examples
{
    public class ExampleTest : RideBaseMinimal
    {
	}
}


  1. Save this file to the same sub-folder inside of /Assets/Scenes named after the new scene, which also contains the scene file itself.
  2. Unity editor, in Hierarchy panel, right-click and choose Create Empty from the context menu.
  3. Rename object to match the scene name.
  4. Ensure object selected.
  5. Inspector panel, click Add Component button.
  6. In the search field, type the name of newly saved script, which matches the object/scene name.
  7. Click the script result to add it to the object as a component.
  8. In Project panel, search field, type “ridesystems”
  9. Drag the corresponding prefab into the scene Hierarchy. This prefab initializes all the systems available in RIDE. Expand the prefab in the Hierarchy view to disable systems as desired.
  10. Save scene.
  11. Verify the scene works by clicking the Play button in the top-center of the Unity toolbar to compile and launch the scene.
  12. Open the Console panel to watch for any errors/warnings. If an error appears, double-check the content of the newly saved script file.
  13. If the scene runs successfully, stop the editor run-time mode by clicking the Play button again.

Achievement Unlocked!

Now that the test scene is compatible with the LevelSelect scene, it can be further developed or added to the LevelSelect scene Demos listing. See next section for instruction.


Customize the LevelSelect Scene Featured Listing 

Adding a new scene to the Featured listing

  1. Unity editor, open LevelSelect scene: Assets/Scenes/LevelSelect/LevelSelect.unity
  2. In Hierarchy, select LevelSelect object.
  3. Inspector panel, expand Sections property.
  4. Expand the Featured sub-property of this section.
  5. Each scene has its own separate entry.
  6. Click the “+” icon at the bottom of the sub-property to add a new scene entry.
  7. This new entry will be a duplicate of the previous entry, containing all of the same data values.

Modifying a new scene in the Featured section

  1. As mentioned in the last set of instructions, the added scene contains duplicate data from the previous entry of the listing.
  2. Expand the entry to reveal its properties:
    • Name: Enter the name of the desired scene exactly as it appears in the /Assets folder.
    • Display Name: Enter a clear, descriptive name. This name will become the corresponding button label in its listing at run-time.
    • Capabilities: Select any items from the dropdown which apply to the desired scene. At run-time, these entries display tool-tips with more information.  
    • Related Projects: Select any items from the dropdown which apply to the desired scene. These also have tool-tips and hotlink to that respective project’s documentation. 
    • Description: Used to detail the purpose of the scene and its intended function.
    • Instructions: List any commands and operations the user may need to perform while the scene is active. Note, feature incomplete; text currently does not display at run-time.
  3. Modify any new/existing scene entries as desired.
  4. Recommend at this point saving any changes to the now customized LevelSelect scene.

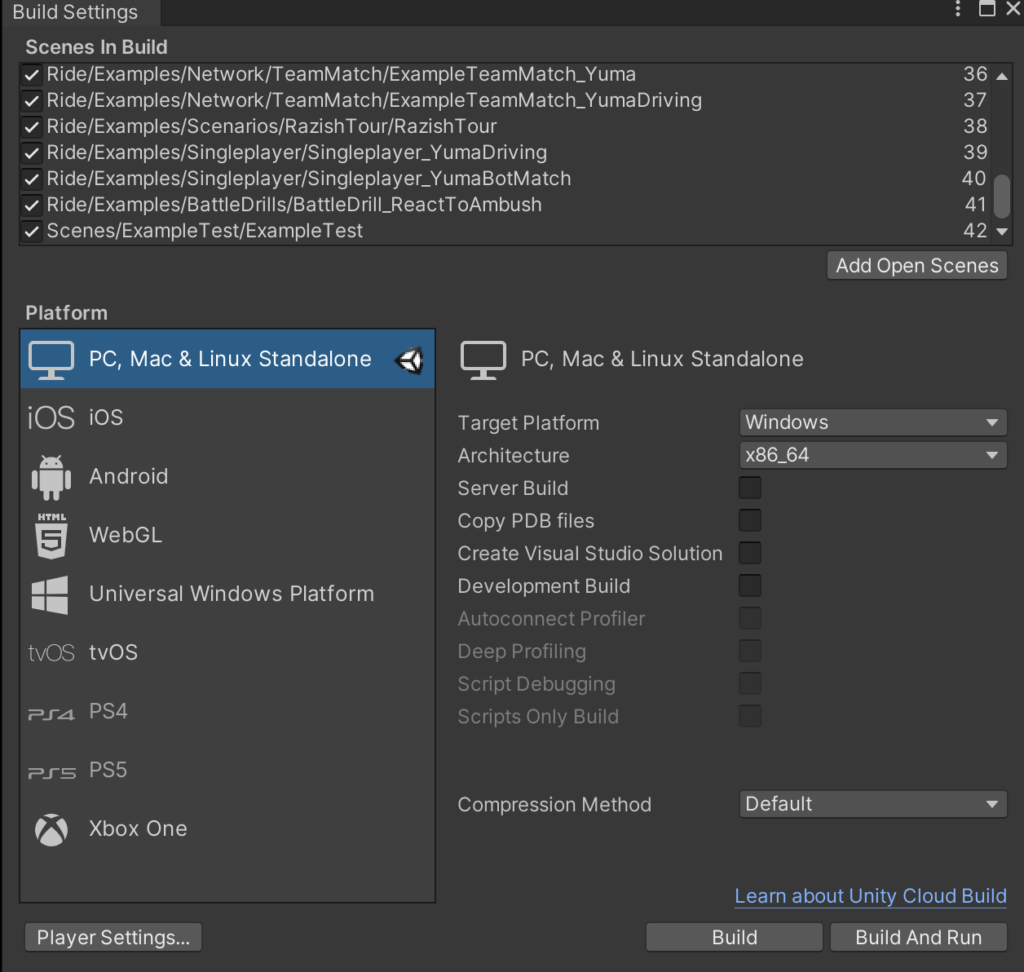
Important

New scenes must be added to the Unity project’s Build Settings list in order to then appear in the LevelSelect scene listings at run-time. See next section for instruction.


Adding new scenes to Build Settings

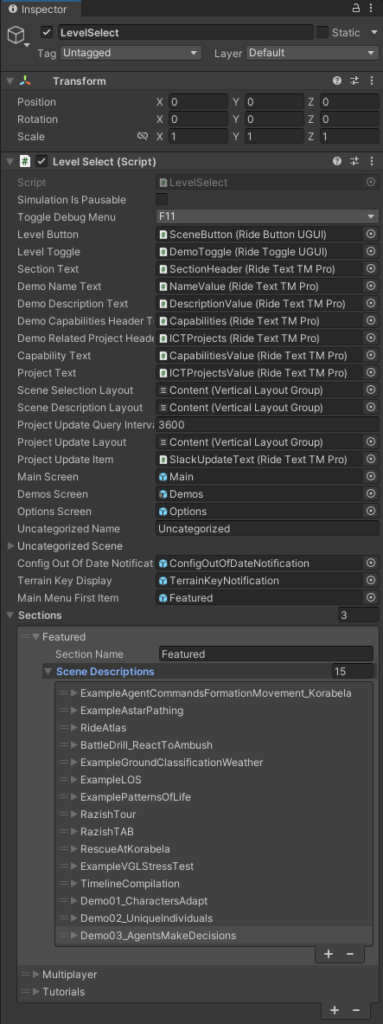
Any new scenes included as Scene Description entries must also be added to the Unity project’s Build Settings list in order to appear in the LevelSelect scene Featured listing at run-time.

  1. Unity editor, open the desired scene intended for inclusion in the LevelSelect scene Featured listing. Most scenes are found in the /Assets/Scenes folder.
  2. Choose File > Build Settings…
  3. Under “Scenes in Build” section, click “Add Open Scenes” button.
  4. The new scene appears at the bottom of the list.
  5. Repeat steps for additional scenes.
  6. Click X to close the Build Settings dialog.
  7. Note, Unity editor automatically saves changes to Build Settings.

Verifying new scenes in Featured listing at run-time

After including any desired new scenes to the Build Settings and ensuring their respective Scene Descriptions entries are complete, verify the scenes appear as expected in the Featured listing at run-time.

  1. Unity editor, open LevelSelect scene: Assets/Scenes/LevelSelect/LevelSelect.unity
  2. Click the Play button in the top-center of the Game panel to compile and launch the scene.
  3. From the LevelSelect main menu, select Featured.
  4. Scroll to the bottom of the listing to find the new scenes.
  5. Click the button for each new scene and verify the content in the details column to the right.
  6. Click the Play button to launch the scene.
  7. If the scene runs as intended, press the Esc key to return to the listing and launch any other new scenes for verification.
  8. Stop the editor run-time mode by clicking the Game panel Play button again.

Customize Capabilities and Projects Options

How to create new Capabilities entries inside dropdown of Scene Descriptions sub-properties

  1. Unity editor, open LevelSelect scene: Assets/Scenes/LevelSelect/LevelSelect.unity
  2. In Hierarchy, select LevelSelect object.
  3. Inspector panel, find the primary Script file field at the top of the various dependency entries of the script component.
  4. Click the LevelSelect script entry in the corresponding field.
  5. In the Project panel, the script source file will highlight.
  6. Double-click this file (LevelSelect.cs) to open it in the system default text editor. Recommend Notepad++ or other source code editor.
  7. Find the corresponding Dictionary for Capability.
  8. Highlight last entry from open to closed ellipsis followed by a comma.
  9. Copy entry text.
  10. Next, place cursor at end of entry line and press Enter to create a new line with the cursor indented, matching the previous entry.
  11. Paste entry text.
  12. Modify value after “CapabilityFlags.” ensuring an underscore is used for any spaces and ends with a comma. 
  13. Modify “name” text within quotes to the desired capability label.
  14. Modify “description” text within quotes to describe the capability in brief.
  15. Ensure open and closed ellipsis align with previous entries and that final closed ellipsis followed by a comma.

    LevelSelect.cs
				
					
static readonly Dictionary<CapabilityFlags, Capability> m_capabilities = new()


{ CapabilityFlags.Test_Capability, new Capability { name = "Test Capability", description = "Test Capabilities option" } },			
				
			
  1. Save changes to file.
  2. Allow Unity editor to reload this source file before modifying any scenes.

How to a create new Related Projects entries inside dropdown of Scene Descriptions sub-properties

  1. Unity editor, open LevelSelect scene: Assets/Scenes/LevelSelect/LevelSelect.unity
  2. In Hierarchy, select LevelSelect object.
  3. Inspector panel, find the primary Script file field at the top of the various dependency entries of the script component.
  4. Click the LevelSelect script entry in the corresponding field.
  5. In the Project panel, the Projects source file will highlight.
  6. Double-click this file (LevelSelect.cs) to open it in the system default text editor. Recommend Notepad++ or other source code editor.
  7. Find the corresponding Dictionary for Project.
  8. Highlight last entry from open to closed ellipsis followed by a comma.
  9. Copy entry text.
  10. Next, place cursor at end of entry and press Enter to create a new line with the cursor indented, matching the previous entry.
  11. Paste entry text.
  12. Modify value after “ProjectFlags.” ensuring an underscore is used for any spaces and ends with a comma. 
  13. Modify “name” text within quotes to the desired project label.
  14. Modify “acronym” text within quotes to the desired project acronym.
  15. Modify “description” text within quotes to describe the project in brief.
  16. Modify “url” address within quotes to the corresponding project website.
  17. Ensure open and closed ellipsis align with previous entries and that final closed ellipsis followed by a comma.
     

    LevelSelect.cs


static readonly Dictionary<ProjectFlags, Project> m_projects = new()


            { ProjectFlags.TEST, new Project { name = "Test Project",
                          acronym = "TEST",
                          description = "Test project option.",
                          url = "https://ict.usc.edu/" } },						  
				
			
  1. Save changes to file.
  2. Allow Unity editor to reload this source file before modifying any scenes.

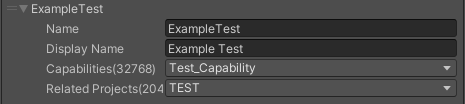
Important

Capabilities and Integrated Projects additions must also be referenced as enumerator Flags within LevelSelect.cs in order to then appear as options inside the Capabilities and Related Projects dropdowns of the Scene Descriptions sub-properties. See next section for instruction.

How to add new Capabilities and Related Projects dropdown entries inside Scene Descriptions sub-properties

  1. Unity editor, open LevelSelect scene: Assets/Scenes/LevelSelect/LevelSelect.unity
  2. In Hierarchy, select LevelSelect object.
  3. Inspector panel, find the primary Script file field at the top of the various dependency entries of the script component.
  4. Click the LevelSelect script entry in the corresponding field.
  5. In the Project panel, the Projects source file will highlight.
  6. Double-click this file (LevelSelect.cs) to open it in the system default text editor. Recommend Notepad++ or other source code editor.
  7. Find the corresponding Flags enumerator for Capability.
  8. Add Capabilities entry:
    • Under “public enum CapabilityFlags” section, highlight last entry from start of label to end comma.
    • Copy entry text.
    • Move cursor after comma for copied entry.
    • Press Enter to create a new line with the cursor indented, matching the previous entry.
    • Paste entry text.
    • Modify label text to match the “name” text for the corresponding entry within the previously edited Capabilities dictionary. Note, any spaces must be replaced by underscores.
    • Increment the ending numerical value representing the entry by one.
    • Save changes to file.
       
      LevelSelect.cs
				
					
        [Flags]
        public enum CapabilityFlags


            Test_Capability             = 1 << 15,			


  1. Add Project entry:
    • Under “public enum ProjectFlags” section, highlight last entry from start of label to end comma.
    • Copy entry text.
    • Move cursor after comma for copied entry.
    • Press Enter to create a new line with the cursor indented, matching the previous entry.
    • Paste entry text.
    • Modify label text to match the “acronym” text for the corresponding entry within the previously edited Projects dictionary. 
    • Increment the ending numerical value representing the entry by one.
    • Save changes to file.
       
       
      LevelSelect.cs
				
					
        [Flags]
        public enum ProjectFlags


            TEST  = 1 << 11,	
				
			
  1. Allow Unity editor to reload this source file before modifying any scenes.

Verifying new Capabilities and Related Projects dropdown entries inside Scene Descriptions sub-properties

After including any desired additions to Capabilities and Projects dictionaries and adding their respective enumerator Flags within LevelSelect.cs, verify the entries appear as expected inside their respective dropdowns of the Scene Descriptions sub-properties.

  1. Unity editor, open LevelSelect scene: Assets/Scenes/LevelSelect/LevelSelect.unity
  2. In Hierarchy, select LevelSelect object.
  3. Find the Section properties, and expand the Scene Description sub-group.
  4. Expand properties of any scene entry.
  5. Click Capabilities dropdown.
  6. Select new entry at bottom of list.
  7. Click Related Projects dropdown.
  8. Select new entry at bottom of list.
  9. Save scene.
  10. Verify the scene customization works by clicking the Play button in the top-center of the Unity toolbar to compile and launch the scene.
  11. From the LevelSelect main menu, select Featured.
  12. Scroll to the bottom of the listing to find the new scenes.
  13. Click the button for each new scene and verify the content in the details column to the right.
  14. Open the Console panel to watch for any errors/warnings. If an error appears, double-check the content of the script files.
  15. If Capabilities and Integrated Projects details appear as intended, stop the editor run-time mode by clicking the Game panel Play button again.

Tip

Scene entries under Features, Multiplayer, and Tutorial listings’ respective Scene Description sub-properties can be reordered within the panel by simply clicking and dragging from the the double-line icon next to each entry.

Achievement Unlocked!

On account of the LevelSelect scene now successfully customized with new content, a new version of the standalone application can be built locally for demonstration. See next section for instruction.

Building and Running a Local Standalone Application

Configuring LevelSelect scene in Build Settings

Unity provides various options to configure a standalone application prior to building locally.

  1. Unity editor, choose File > Build Settings…
  2. Under “Scenes in Build” ensure all scenes desired for the standalone application are checked.
  3. Platform options, use default: PC, Mac & Linux Standalone.
  4. Ensure Architecture property set to x86_64.
  5. Note, additional properties are linked from the “Player Settings…” button.

Building and running local LevelSelect standalone application

  1. When ready to build the local standalone application, return to File > Build Settings…
  2. Click Build button.
  3. In the build location window, navigate to one level outside of the current project folder. Depending on local file structure, this could be outside of /RideUnity or /trunk.
  4. Create a new folder, and name it “bin”.
  5. Open “bin” and create a sub-folder with a unique name.
  6. Ensure this folder is selected, and then click Select Folder.
  7. Unity build process will initialize, and display a “Building Player” dialog.
  8. Once finished, the /bin unique sub-folder will open in a new window.
  9. Run the RIDE executable.
  10. Verify the RIDE main menu appears, and any selected scene from the Demos listing loads as expected.

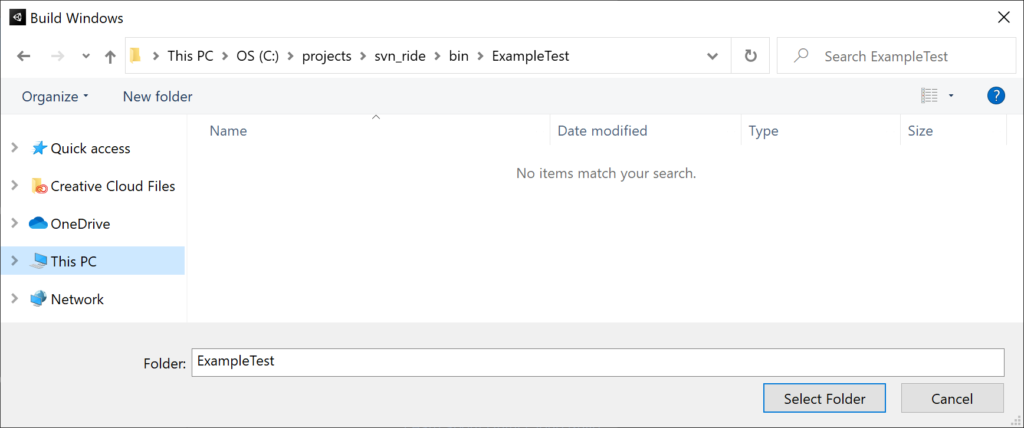
Important

If distributing the local executable within your organization, compress (zip) the entire contents of the unique sub-folder. The executable is dependent upon the various resources within it.


Unity Reference and Training

Resources to build familiarity with the Unity editor and application development.

Unity Manual, Version 2022.1

Unity Scripting API, Version 2022.1

Unity Learn Premium, Getting Started With Unity

Unity Learn Premium, Tutorials