A* Pathing

Overview

This page is divided into two sections; the first outlines the example scene for demonstration purposes and the second provides steps for how to use the A* Pathfinding option in a new scene.

Page Contents

ExampleAstarPathing
ExampleAstarPathing

Important

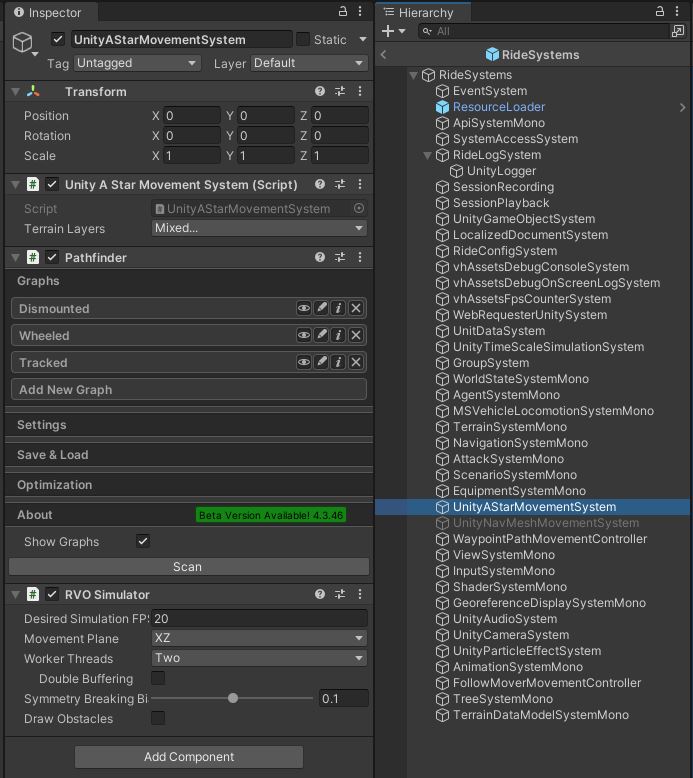
This example utilizes the A* Pathfinding Project Pro package which can be obtained from the Unity Asset Store. This solution is optional for RIDE users currently.


Example Scene

Purpose

Observe the movement behavior of multiple units under the A* Pathfinding movement system option.

How to Use

The terrain panel appears by default on scene launch and is divided into the following options:

GUI Debug Menu Navigation

Top Options
  • Toggle format of terrain maps; use the arrows to select between Split LMAB (default) and Single LMAB formats. System/System2 display various real-time stats.
  • Note, recommend Split LMAB for most users.
General
  • Clear Terrain – Removes an in-progress or completely loaded terrain map from the scene.
  • Clear Data Cache – Removes …\AppData\LocalLow\USC-ICT\Ride\datacache folder; use this command in the event terrain maps fail to load properly.
  • Center Camera – Places the camera at the defined map center of the terrain map.
Load Terrain
  • Load Trees – Click to toggle off/on. Replaces low-detail tree geometry in the map with various high-fidelity SpeedTree objects; note, may not be available in all maps.
  • Use Camera Pos As Start – Terrain map streams into scene from approximate scene camera location; used in conjunction with Radius slider.
  • Radius – Adjust the slider to change the distance at which terrain tiles are rendered from the current camera position.  
  • CPU Usage: Adjust the slider to allocate more resources to the loading of terrain tiles. A higher value may cause the editor to be unresponsive for several seconds as it attempts to render many tiles at once. Recommend the default value of 20%.
  • Use Asset Bundles – Unity Asset Bundles are the recommended and default delivery method of terrain map data. 
  • Progress – Indicator of approximate completeness for the streaming of the current terrain map into the scene. 
  • Time – Tracks how long the terrain map took to stream into the scene, reaching 100% completion. 
  • Plane – Instances a simple plane object for test purposes; note, does not have tree objects.

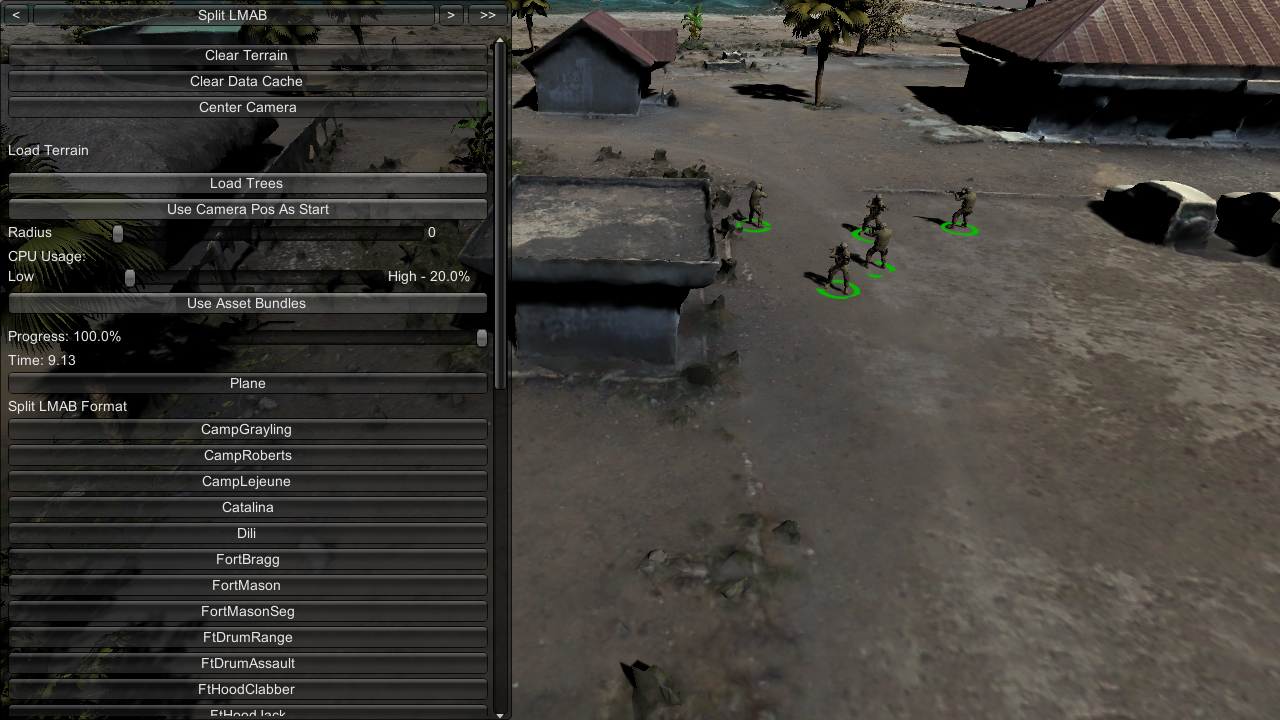
Tip

If steaming terrain on a mobile device (Android/iOS) strongly recommend setting the Radius to a value of < 800 to avoid running out of device memory.

Load Terrain – Split LMAB Format & LOD
  • Select a terrain map, choose a LOD setting (lowest selected by default).
  • Select a Collider. Note, a value other than “None” must be selected in order to enable pathfinding for units.
    Click Load Terrain to begin streaming that terrain map data into the scene. Overall progress statements incrementally appear until loading finishes (1.0 value).
Load Terrain – Single LMAB Format & LOD
  • Select a terrain map, choose a LOD setting (lowest selected by default).
  • Click Load Terrain to begin streaming that terrain map data into the scene. Overall progress statements incrementally appear until loading finishes (1.0 value).

Important

The steaming of Single LMAB terrain maps, with the exception of those with the “s3” location designation, only function while on the ICT domain. If remote, ensure your ICT VPN is active.

Tip

Navigation Controls: 

  • WASD keys – Move the camera forward/backward/left/right
  • Q/E keys – Lower and raise the camera
  • Use the J key to toggle “free-look” mouse cursor control

Press F11 on Windows platform to toggle off/on the terrain loading menu.

Use the top arrows in the debug menu to switch between the other system menus.

Unit Movement Commands

Drag-select single or multiple agents by left-click, and then direct agent(s) to a waypoint on the terrain designated by right-click of the mouse. Agents will navigate around obstacles to reach a set waypoint and stop. Navigation of agents can be interrupted by another right-click of the mouse; agents will then navigate to that new waypoint location.

Scene Location & Name

Assets/Ride/Examples/AstarPathing/ExampleAstarPathing.unity

Setup Requirements 

Utilize the terrain loading capability with debug menu and unit instantiation for your scene with the ExampleAstarPathing script. 

ExampleAstarPathing Script

Simply add this script to an empty game object in your scene: Assets/Ride/Examples/AstarPathing/ExampleAstarPathing.cs

Spawn Locations

Add empty game objects to the scene to serve as spawn points, which are then referenced in ExampleAstarPathing.cs.

Manually Enable A* Pathfinding

The A* Pathfinding Project Pro package is now available as an alternative to using Unity’s native Pathfinding solution.  Future releases may have this option be the default.

  1. In order to enable the A* Pathfinding option, go into the RideSystems prefab.
  2. Select the UnityNavMeshMovementSystem. 
  3. In the Inspector, at the top, to the left of its name, de-select the checkbox.  This disables the system. 
  4. Now, select the UnityAStarMovementSystem and select the checkbox.  This enables the system.

Known Issues

  • Not quite feature par with Unity’s solution
  • Still working on loading/caching features
  • Units have trouble navigating on certain terrains

Future Benefits

Since the navigation is loaded at runtime, there’s no need to generate a navmesh offline.  This eliminates the cumbersome step of generating a navmesh for each scene.  

It’s possible to now load multiple terrains within a single scene.  Instead of a TeamMatch scene for each terrain dataset, there could exist e a single scene, with a menu option to choose which terrain to load.

Setting up A* Pathfinding Navigation

Caching navigation graphs

In this method, navigation graphs are saved to a cache file. This is somewhat similar to baking a navmesh in Unity’s default navigation system.

  1. Open the scene that you want to save the navigation graphs to.
  2. In the Hierarchy, go to the UnityAStarMovementSystem game object in the RideSystems prefab.
  3. Look at the Pathfinder component in the UnityAStarMovementSystem game object. You should see three graphs already in Pathfinder component, Dismounted, Wheeled, and Tracked.
  4. For each graph, check the bounds of the navigation mesh and edit them if needed. Click Snap bounds to scene to automatically set bounds using the existing 3D meshes in the scene, or adjust the Center, Size, and Rotation fields as needed. If you want to ignore meshes when snapping bounds automatically, you can either temporarily disable the mesh’s game object, or use a layer mask. The graph’s bounds will appear as a white box in the scene, provided that the view has gizmos activated.
  5. Click Scan at the bottom of the Pathfinder component to begin scanning the navmesh.
  6. Once the process is finished, check to make sure your graphs are where you want them. Click the eye icon for each graph to hide them to aid in visual inspection. (Make sure Show Graphs is checked on if you want to see graphs)
  7. Disable the Scan on Awake option in the Settings tab of the Pathfinder component. If this is not disabled, the scene will rescan the scene at runtime and will ignore the scan we had just made.
  8. In the Save & Load tab of the Pathfinder component, click Generate Cache to create a .bytes file that will contain our navigation mesh info for this scene. Unity will ask if you want to scan for meshes before generating the cache. Since we just did that ourselves, you can click No. The cache file will be stored in Assets/GraphCaches. Rename this file in editor if you’d like. Make sure Cache startup is checked and that the cache file is assigned.
  9. Save the scene to keep your changes to the Pathfinder component.
  10. The scene should now use the graphs that you just scanned at runtime.